- Configuring Shipment Tracking
- Webhook URL
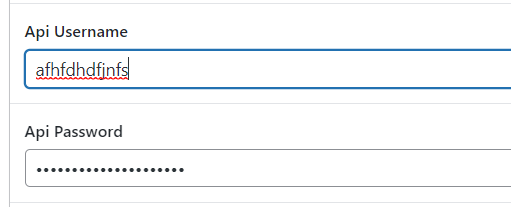
- Api Username
- Api Password
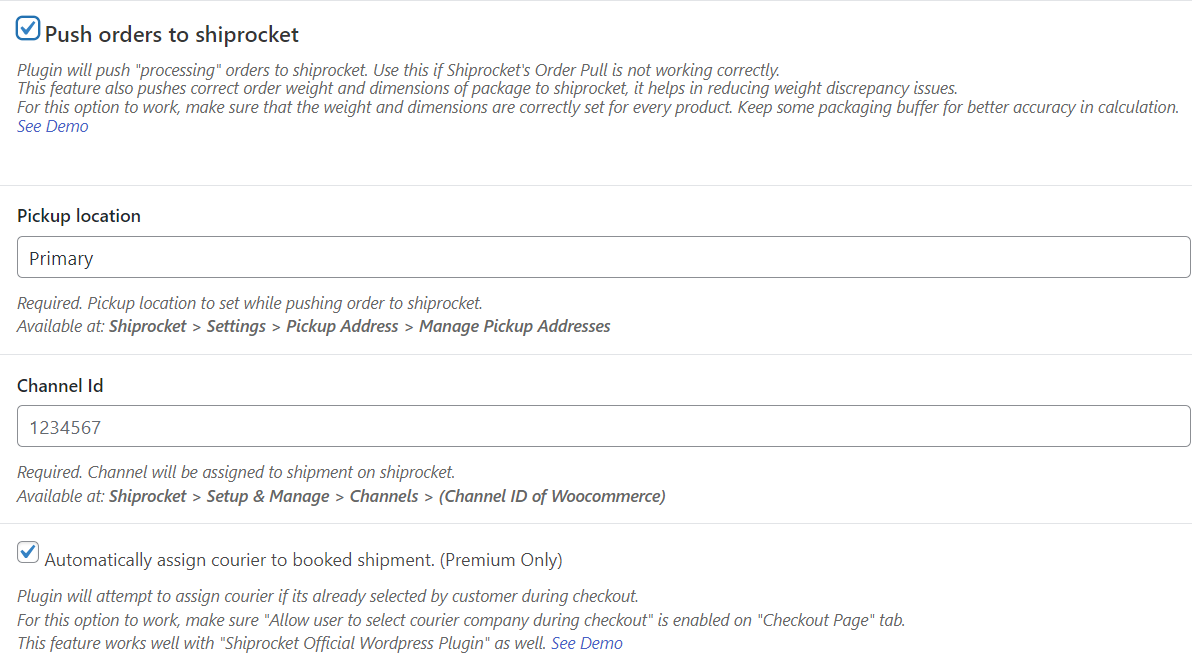
- Push orders to Shiprocket
- Custom Tracking URL
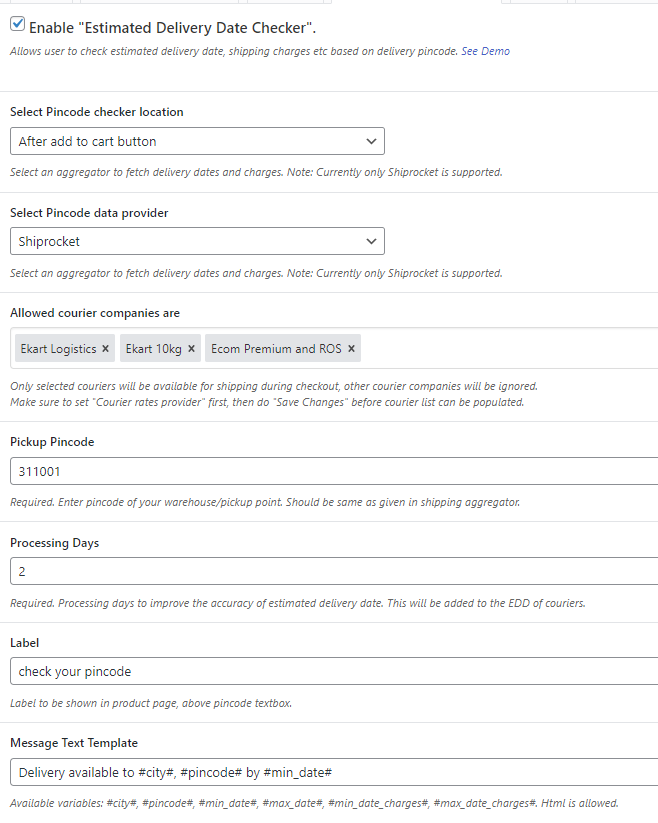
- Enable Estimated Delivery Date Checker
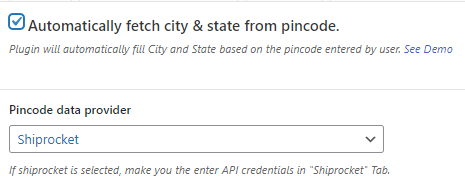
- Automatically fetch city & state from pincode
- Let users select courier company for shipping
Shiprocket is a leading logistics and shipping aggregator platform based in India. It provides e-commerce businesses with a comprehensive suite of shipping solutions to streamline their logistics operations. Shiprocket connects sellers with multiple courier partners, allowing them to choose the most suitable carrier for each shipment. For more detail please visit shiprocket.in Here are some key features and services offered by our plugin.
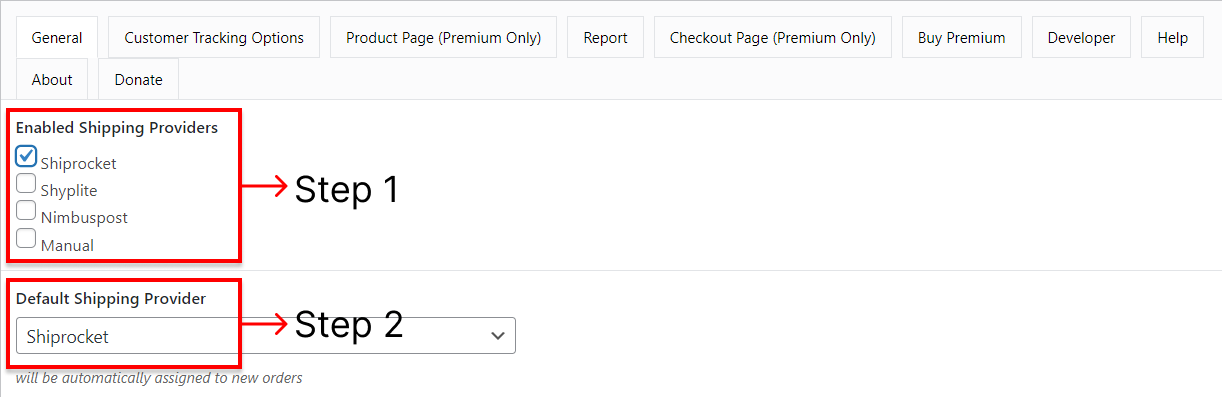
You must perform two steps to enable Shiprocket tab:
- Select “Shiprocket” in the “Enabled Shipping Providers” section to enable it as one of the available shipping options.
- Then, choose “Shiprocket” again in the “Default Shipping Provider” section to set it as the default option for shipments when customers do not specify a specific shipping provider during checkout.
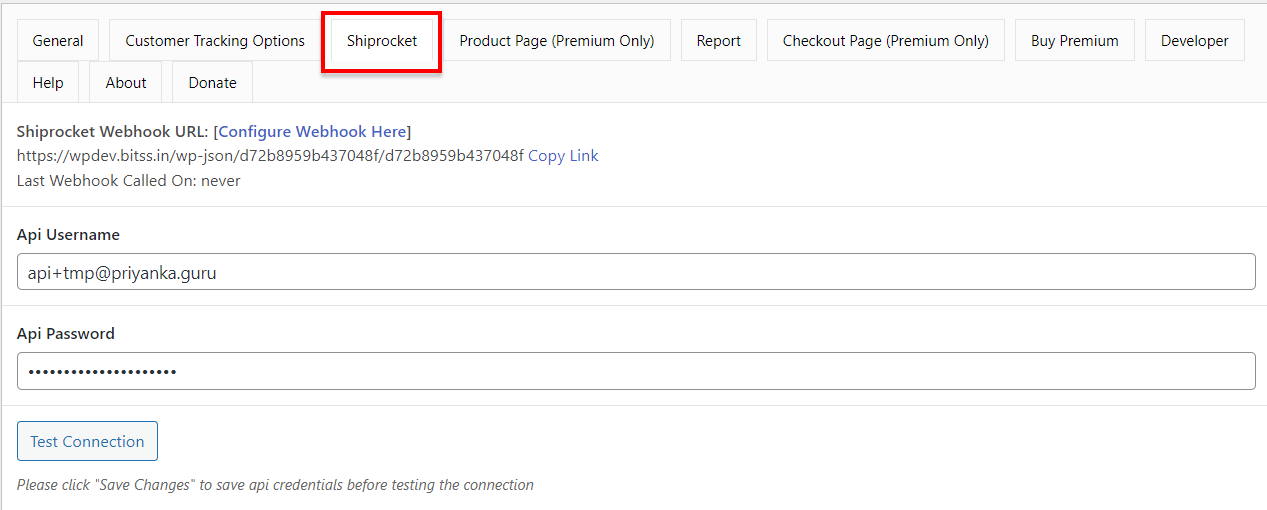
Wp Admin -> WooCommerce -> Shipment Tracking -> Shiprocket - If you have completed these steps, the “Shiprocket” tab will be displayed above.
Wp Admin -> WooCommerce -> Shipment Tracking -> Shiprocket
- Configuring Shipment Tracking
Step 1: Copy the Shiprocket Webhook URL.
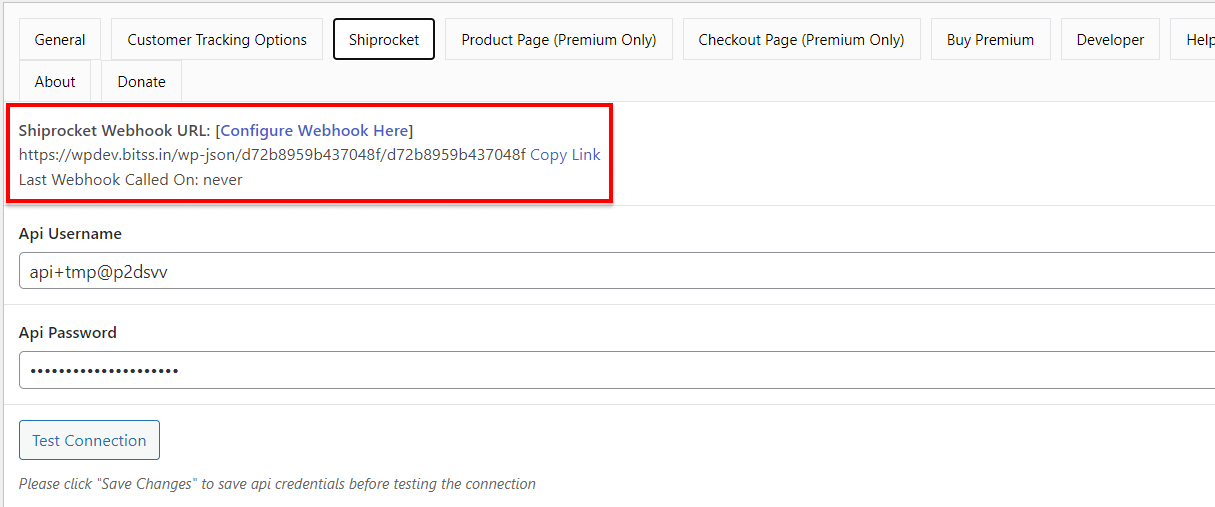
Step 2: Paste the URL in a Shiprocket Website.
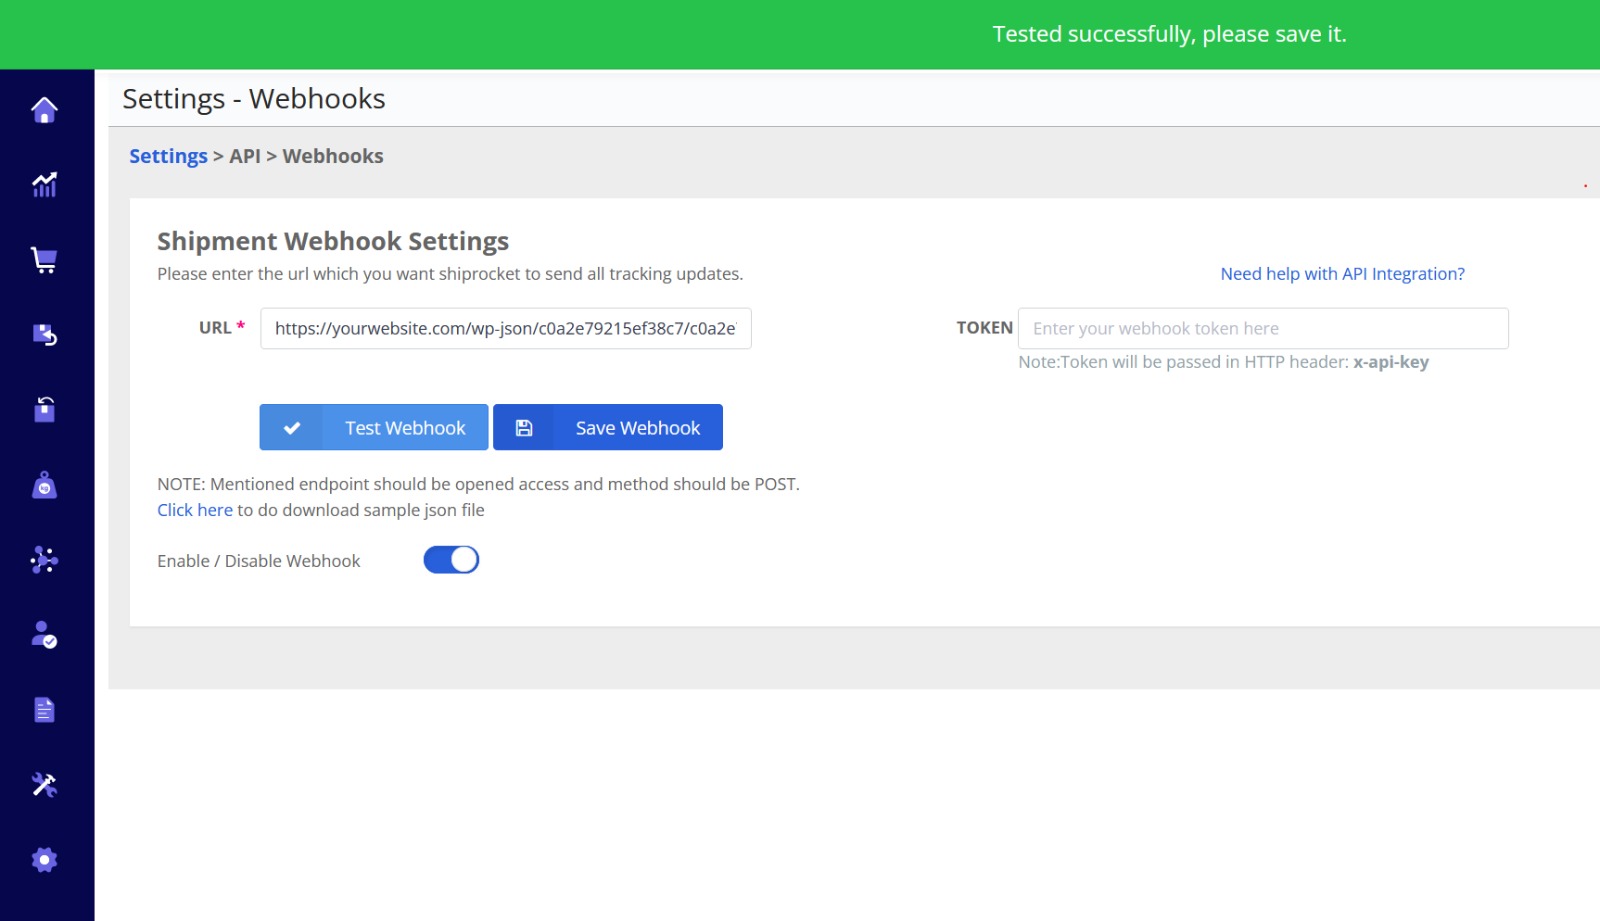
Step 3: Automatically Fetch Data on Our Plugin.
Step 4: All Done. - Webhook URL: The plugin supports configuring a webhook URL provided by Shiprocket. This allows the plugin to receive real-time updates and notifications from Shiprocket’s services, enabling seamless communication between your website and Shiprocket’s shipping platform.

Wp Admin -> WooCommerce -> Shipment Tracking -> Shiprocket - Api Username: To integrate with Shiprocket’s API, the plugin requires the API username. This unique identifier helps authenticate and authorize the plugin’s access to Shiprocket’s shipping services.
- Api Password: The API password serves as a security key for the integration with Shiprocket’s API. It works in combination with the API username to securely establish a connection and enable data exchange between your plugin and Shiprocket’s servers.
Wp Admin -> WooCommerce -> Shipment Tracking -> Shiprocket - Push orders to Shiprocket: The plugin allows you to push orders directly to Shiprocket for efficient processing and fulfillment. To do this, you need to configure the following settings:
-
- <strong”>Pickup location: Specify the pickup location from where the shipments will be collected by the courier partner.
- Channel Id: Provide the Channel ID associated with your Shiprocket account.
- Automatically assign courier to booked shipment: Enable this option to let Shiprocket automatically assign a courier partner for each shipment.
Wp Admin -> WooCommerce -> Shipment Tracking -> Shiprocket
-
- Custom Tracking URL: The plugin supports customization of the tracking URL, allowing you to provide a personalized and branded tracking experience for your customers.

Wp Admin -> WooCommerce -> Shipment Tracking -> Shiprocket - Enable Estimated Delivery Date Checker: This feature allows you to provide an estimated delivery date to customers based on their location. Configure the following settings:
-
- Select Pincode checker location: Choose the location from where the plugin will check the pincodes to calculate estimated delivery dates.
- Select Pincode data provider: Specify the data provider that will supply the pincodes for the estimation.
- Allowed courier companies are: Define the courier companies that will be used for estimating delivery dates.
- Pickup Pincode: Set the pickup pincode from where shipments will be dispatched.
- Processing Days: Define the number of days required for order processing.
- Label: Customize the label for the estimated delivery date displayed to customers.
- Message Text Template: Set a template for the message that customers will see for estimated delivery dates.
Wp Admin -> WooCommerce -> Shipment Tracking -> Product Page * After enabling these settings, the changes will be visible on the website view.

-
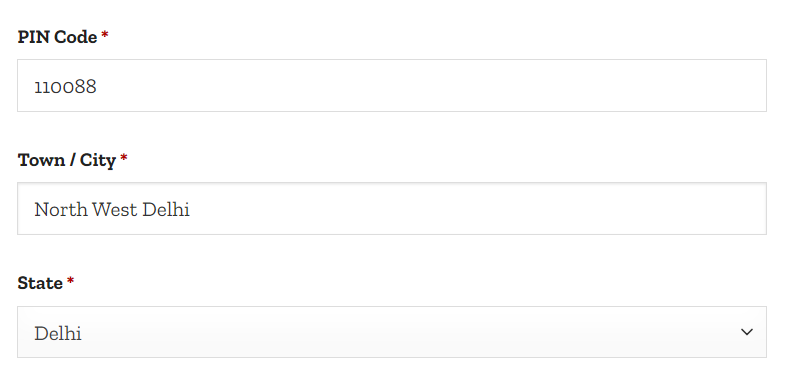
- Automatically fetch city & state from pincode: With this option, the plugin can automatically fetch the city and state information based on the provided pincode, saving time during order processing. Configure the Pincode data provider to enable this functionality.
Wp Admin -> WooCommerce -> Shipment Tracking -> Checkout Page * After enabling these settings, the changes will be visible on the website view.
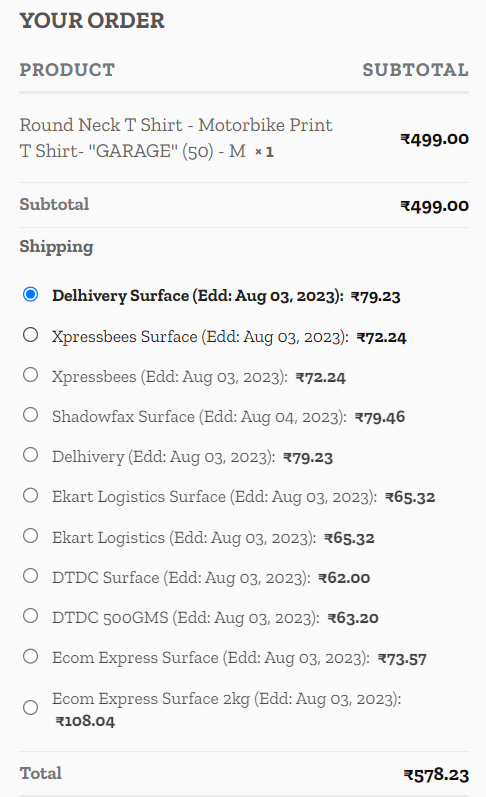
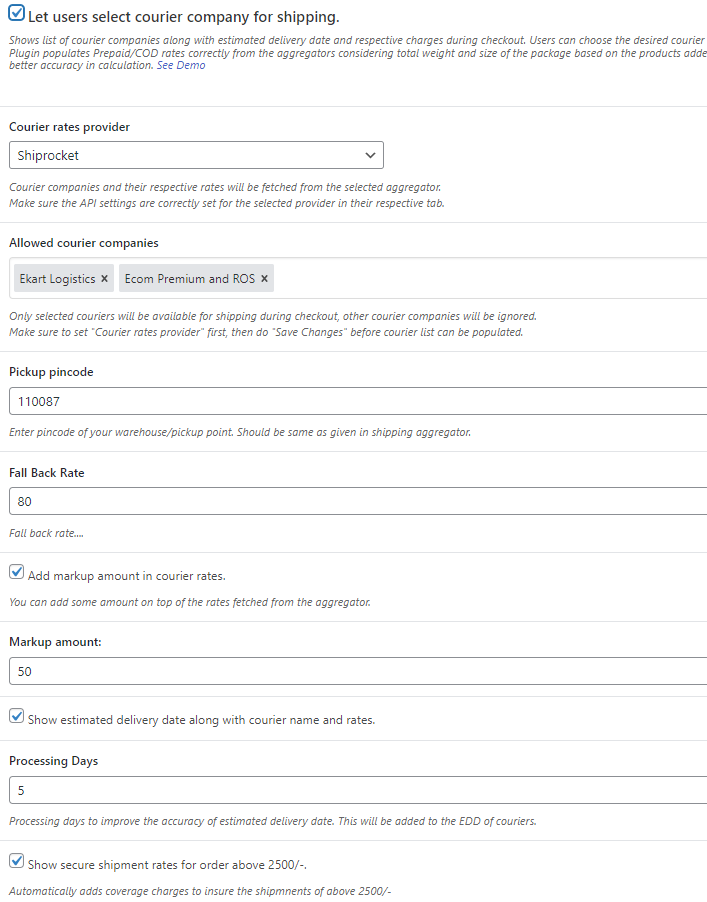
- Let users select courier company for shipping: This feature allows users to choose their preferred courier company during the checkout process. Configure the following settings:
-
-
- Courier rates provider: Specify the provider that will supply the courier rates for different companies.
- Allowed courier companies: Define the list of courier companies available for selection.
- Pickup pincode: Set the pincode of the pickup location.
- Fall Back Rate: Provide a fallback rate in case the selected courier company is not available.
- Add markup amount in courier rates: Optionally, add a markup amount to the courier rates for additional charges.
- Markup amount: Set the value of the markup amount.
- Processing Days: Define the number of days required for order processing.
- Show secure shipment rates for order above 2500/-: Display secure shipment rates for orders exceeding the specified amount (e.g., 2500/-).
Wp Admin -> WooCommerce -> Shipment Tracking -> Checkout Page
-
* After enabling these settings, the changes will be visible on the website view.